
Tip & Trick
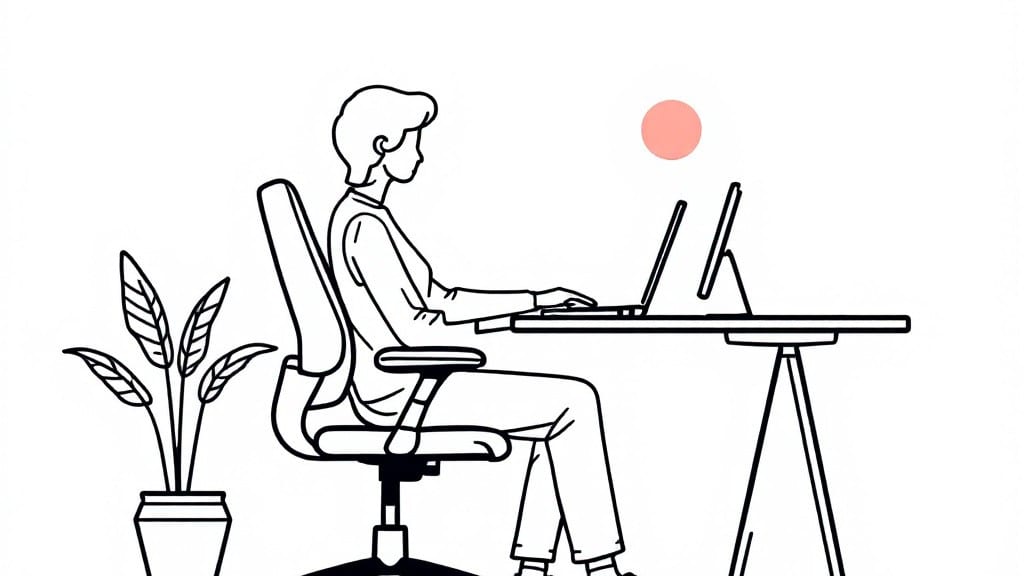
Setting up an ergonomic workstation isn’t just about comfort—it’s about transforming your daily computing into a pain-free, productivity-boosting experience. ⚡ I’ve spent years adjusting my own setup after back problems flared up from hunched typing sessions, and the difference is night and day.
The key isn’t buying expensive gear but positioning what you have correctly to support your body while you work.
Start with your monitor at eye level—use a stack of books or a riser if needed—and position it about 20 inches away to reduce eye strain.
Your keyboard should sit just below elbow height with your wrists straight, not bent, and your chair adjusted so your feet rest flat with knees at a 90-degree angle. These small tweaks prevent the creeping aches that sneak up after hours at a desk.
Software plays a role too: dim screen brightness to match ambient light, enable posture reminders like Stretchly, and take a 2-minute stretch every hour. I’ve seen people go from slouching all day to sitting tall with just these adjustments—no fancy equipment required.
The real win? Your body will thank you by the end of the workday.
Common pitfalls include ignoring chair height (feet dangling causes back strain) or positioning monitors too high (forcing neck craning). Test your setup by standing up—if you’re not relaxed, something’s off. Trust me, your future self will appreciate the effort. Let’s get started with the exact steps that work.
📚 In This Guide
- What you need
- Instructions
- Tips and common mistakes
- Wrapping up and next steps
What you need
- ● Adjustable chair – Look for one with lumbar support, armrests, and height adjustability (e.g., Herman Miller Aeron or budget-friendly IKEA Markus).
- ● Desk or work surface – Height should allow your elbows to rest at 90°–110° when typing. Consider an adjustable-height desk (e.g., FlexiSpot E7) if possible.
- ● Monitor(s) – At least one 24" screen (or dual 22"–24" monitors) with adjustable height/tilt. Aim for eye level at the top 1/3 of the screen.
- ● Keyboard & mouse – Ergonomic models (e.g., Microsoft Sculpt or Logitech MX Master) to reduce wrist strain.
- ○ Footrest or stool – Optional but helpful for those with shorter legs (e.g., Gorilla Pods or a sturdy box).
- ● Anti-fatigue mat – If standing, use a cushioned mat (e.g., Gorilla Grip) to reduce leg fatigue.
- ● Laptop stand – Elevates your screen to proper eye level (e.g., Amazon Basics or VIVO stands).
- ● Monitor arm – Frees up desk space and allows precise positioning (e.g., Ergotron).
- ● Blue light glasses – Reduces eye strain during long hours (e.g., Gunnar or Uvex Skyper).
- ● Document holder – Keeps papers at eye level to avoid neck strain.
- ● Wrist rests – Use only for breaks (not while typing) to prevent nerve compression.
- ● Small plants or stress ball – For mental breaks and comfort!
Step-by-Step instructions for creating a pain-free ergonomic workstation
Here's the method I use to transform any desk into a posture-friendly powerhouse—tested across offices and home setups.
🔧 Step 1: Position Your Monitor at Eye Level
The monitor is the command center of your workspace, and its height directly impacts your neck and shoulder alignment. I always adjust it so the top edge sits at or just below eye level when seated. This prevents that constant upward tilt that strains your cervical spine over time.
Use a sturdy monitor stand or stack a few books under the base if you don't have an adjustable arm. The goal is to look straight ahead at the center of the screen—no craning forward or tilting your head. If you wear bifocals, the monitor should sit slightly lower to accommodate your reading prescription without neck strain.
Verify your setup by sitting back in your chair and checking if you can see the top of the screen without lifting your chin. If you can't, adjust the height until you can—this small tweak eliminates one of the most common ergonomic mistakes I see in offices.
⌨️ Step 2: Align Your Keyboard and Mouse for Neutral Wrists
Your keyboard and mouse should sit directly in front of your body, creating a straight line from your shoulders to your wrists. I recommend placing them about 6-12 inches from the edge of your desk to give your arms enough room to rest naturally at your sides when not typing.
For the keyboard, use a wrist rest only if it maintains your wrists in a straight position—not bent at the wrists. Some people find that resting their wrists actually increases tension, so I only recommend it if it feels comfortable. The mouse should sit at the same height as the keyboard to prevent shoulder hunching.
Test your position by extending your arms straight out—your elbows should form a 90-110 degree angle. If your shoulders creep up toward your ears, you're reaching too far. Adjust the keyboard position until your arms hang comfortably at your sides when typing.
🖱️ Step 3: Optimize Chair and Seat Height for Proper Leg Support
Your chair height should allow your feet to rest flat on the floor or a footrest, with your knees at 90-110 degrees. I always check this first because poor leg support forces people to slouch or cross their legs, both of which create pressure points and poor circulation.
Adjust the seat depth so there's about 2-3 inches of space between the back of your knees and the seat edge. This prevents pressure on the back of your thighs. If your chair has lumbar support, position it to match the natural curve of your lower back—most chairs have an adjustable lever for this.
Sit back in the chair and verify that your lower back maintains contact with the lumbar support without gaping. If you're using a standard office chair without built-in lumbar support, roll up a small towel or use a lumbar cushion to fill the gap between your lower back and the chair.
💡 Step 4: Arrange Your Workspace for Minimal Reaching
Everything you use frequently—phone, notebook, reference materials—should be within an arm's reach to avoid constant twisting and stretching. I arrange my most-used items in a 12-18 inch arc in front of me, so I can access them without leaning forward or turning my torso.
If you need to reference documents often, consider a document holder that attaches to the monitor arm or sits directly in front of you at the same height as your screen. This prevents the awkward neck craning that happens when you look down at a desk-level document while staring at your monitor.
Test your arrangement by sitting back and reaching for each item without shifting your hips. If you find yourself leaning forward or twisting, move that item closer to your center. The goal is to maintain a neutral spine position throughout your workday.
⏰ Step 5: Set Up Reminders for Movement Breaks
Even with perfect ergonomics, prolonged sitting creates stiffness. I schedule 5-minute movement breaks every 30-60 minutes using a timer app or smartwatch reminder. These breaks should include standing, stretching, and walking—even just a lap around the room helps reset your posture.
For seated stretches, I recommend shoulder rolls, neck tilts, and seated twists to counteract the effects of static positioning. If you're working for extended periods, consider a standing desk converter or adjustable height desk to alternate between sitting and standing throughout the day.
Verify your break system works by setting a test reminder now. When it goes off, stand up, walk for 30 seconds, and stretch your arms overhead. This simple habit prevents the cumulative tension that leads to chronic pain over time.
Tips & tricks for perfect ergonomic workstation setup
Transforming your workspace into a posture-friendly powerhouse takes more than just following steps—it's about the details that make all the difference. Here's what I've learned after setting up countless workstations to prevent chronic pain and boost productivity.
Monitor Height Verification: In Step 1, when adjusting your monitor, I recommend using a small piece of tape at eye level on your wall as a reference point. Sit back in your chair and mark where the top of your screen should sit—this visual cue ensures you're not guessing. For laptop users, consider a simple riser or stack of books to achieve the same eye-level positioning without straining your neck.
Elbow Angle Precision: The 90-110 degree elbow angle mentioned in Step 2 is critical, but don't just estimate it. Try this test: Rest your forearms on your desk with fingers pointing forward. Your elbows should form a gentle curve, not a sharp bend or straight line. If your shoulders rise toward your ears, you're reaching too far—move your keyboard closer until your arms hang naturally at your sides when typing.
Chair Adjustment Secrets: For Step 3, here's a pro trick: When adjusting seat depth, slide your fingers into the gap between your knees and seat edge. You should be able to fit about two fingers comfortably—that's your 2-3 inch target. Also, if your chair lacks lumbar support, try rolling up a small towel and securing it with a rubber band to create a temporary support. This simple hack can make a world of difference for lower back comfort.
Movement Break Optimization: The 30-60 minute break schedule in Step 5 works wonders, but I've found that adding a simple stretch routine makes them even more effective. Try this 30-second sequence when your timer goes off: Shoulder rolls (5 times), neck tilts (3 times each side), and seated twists (2 times each direction). This routine takes less than a minute and targets the key tension points from prolonged sitting.
Pro Tips for Set Up Ergonomic Workstation
- Transforming your workspace into a posture-friendly powerhouse takes more than just following steps—it's about the details that make all the difference.
- Monitor Height Verification: In Step 1, when adjusting your monitor, I recommend using a small piece of tape at eye level on your wall as a reference point.
- Elbow Angle Precision: The 90-110 degree elbow angle mentioned in Step 2 is critical, but don't just estimate it.
Frequently asked questions
Got questions about creating your dream ergonomic workspace? You’re not alone—let’s tackle the most common ones to make your setup smooth and pain-free!
What’s the fastest way to set up an ergonomic workstation?
Start with the basics: adjust your chair height so your feet rest flat on the floor, position your monitor at eye level (about an arm’s length away), and use a wrist rest if typing for long periods. Pro tip: Use a free app like ErgoCheck to scan your setup in seconds! Most adjustments take under 10 minutes.
Do I need to buy expensive equipment to make it ergonomic?
Not at all! Many ergonomic fixes are budget-friendly. Swap a stack of books for a monitor stand, use pillows or rolled towels for lumbar support, or repurpose a tray to keep your keyboard/mouse aligned. Prioritize adjustability—even a $50 chair with height control beats a $500 desk without it.
How often should I adjust my ergonomic setup?
Check your posture every 30 minutes—stand, stretch, or tweak your chair/monitor. If you’re working from home, reassess your setup weekly (especially if you’ve gained/lost weight or moved furniture). Listen to your body: Discomfort is your cue to adjust!
What if my chair doesn’t have lumbar support?
No problem! Try a cushion or rolled towel behind your lower back, or use a lumbar roll (often under $20). If you’re seated for hours, consider a standing desk converter or alternating between sitting and standing to reduce strain.
Can I use a laptop as my primary monitor ergonomically?
Laptops are tricky, but you can hack it: Prop the screen up with a stand or books to eye level, use an external keyboard/mouse, and take breaks to avoid neck strain. For long-term use, pair it with a secondary monitor—your neck (and back!) will thank you.
My wrists hurt after typing—how do I fix it?
Wrist pain often signals poor alignment. Keep your forearms parallel to the floor, use a wrist rest (only when resting, not typing), and take micro-breaks to stretch. If pain persists, try an ergonomic keyboard or split keyboard to reduce strain.
Wrapping up and next steps
Creating an ergonomic workstation doesn’t have to be complicated—just intentional. With the right setup, you’ll reduce strain, boost productivity, and even enjoy your workday more. Start small: adjust your chair, position your screen, and take breaks to move. Small changes lead to big comfort!
Ready to feel the difference? Take action today! Try one adjustment this week, then build from there. Your body—and your future self—will thank you. 🎉